Fly tying procedure of my TOP tungsten nymph, with which I fish big chub, grayling and trout as well. In the traditional and very popular form of "Step By Step" photo-serial with a detailed description of the individual tying steps and used materials!
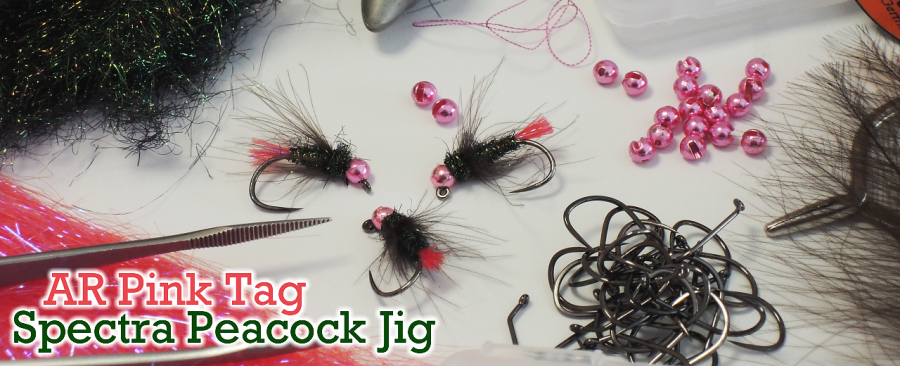
For the continuation of my series "At The Vice", I have prepared a fly tying procedure of one of my very favorite and, of course, maximally effective nymph pattern with a tungsten bead head. I do not consider this type of artificial fly to be a tungsten nymph, but a hybrid between a lighter nymph and a heavier wet fly. This feeling of mine is supported in my head by the way of fly fishing that I most often practice with this type of fly - namely the wet way of fishing over the current, where I catch mostly two similar flies, which I cast across the river to the shore and let them drift freely in the water column in places where I expect active fish.
This is how I catch on medium-sized and large non-trout rivers with a floating, hover or slow intermediate line (depending on the flow and strength of the current). Due to the sharp strikes of large fish, I use a fluorocarbon leader with a diameter of 0.18 mm at least. I regularly catch thanks this style of fishing every season at the turn of spring and summer and in the peak summer many beautiful chub from 40 to 55 cm, and every year I manage to catch individuals that exceed this size range. Therefore, I consider the method of wet fishing with two such flies to be very successful, because for example in active fishing with a streamer there is a chance of even bigger fish, but there are never as many of them as in this casual and natural alternative classic wet fly fishing.
AR Pink Tag Peacock Spectra Jig is usable and very effective when fishing for trout and grayling on trout rivers of course, but in this situatuions I fish with smaller patterns (14 - 18) and more upstream, so basically a short or long nymph against the water. I catch it exclusively using a fly line and a longer thin leader made of fluorocarbon.
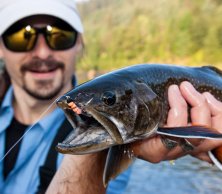
The main use: From the paragraphs written above, it is clear that this is a very universal pattern of nymphs/wet flies, which I developed primarily for catching large chub, ide and other coarse fish - I caught on it barbel (see photo), roaches, bream, river grass carp and perch - on my favorite rivers. When fishing on clear mountain streams, this fly also did not disappoint me and proved itself especially when fly fishing for rainbow trout and nice grayling. I can imagine another use of this pattern in still water fishing with a static "Dry Fly Dropper"/BUNG method, but due to my personal aversion to this pseudo method of fishing, which has become so widespread in still waters today, I will leave the verification of the effectiveness of my fly in this way of fishing to someone else, no problem - and I will continue to fly fishing! ;-)
So, let's tie together today's pattern "AR Pink Tag Peacock Spectra Jig" step by step with a detailed description of the individual operations and used fly tying materials, as always!
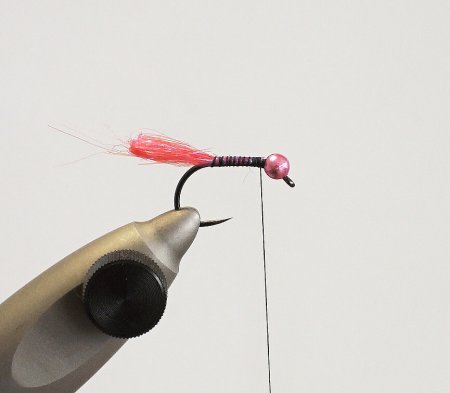
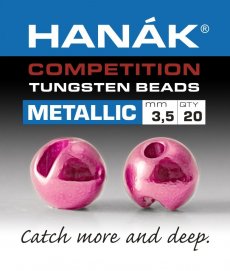
STEP 1: In the first phase, we will thread a Tungsten Beads Hanak Competition Metallic+ in a light pink color with a diameter of 2.5 - 3 mm on the barbless Fly Tying Hook Fulling Mill Jig Force Short BL in size 14 - 16. Another suitable hook, which I also use to tie this pattern, is the Fly Tying Hook Fulling Mill Jig Force BL - most often in sizes 12 - 14. I liked the first mentioned hook mainly because of the deeper bend, shorter hook shank and the eye of the hook - the fly then looks more like a wet pattern and of course it behaves differently on a leader - more like a classic fly, not like a jig. We fix the tungsten bead head with a tying thread and if we do not want it to loosen and twist after soaking the fly - which could gradually untie the fly - we stick the head at the eye of the hook with a drop of super glue. Then we go with tying thread along the lacquered hook shank to the curve of the hook, where we tie a small thin tip from Angel Hair Hends in light pink color as tungsten bead head.
STEP 2: In the second step, we tie a ribbing wire. For this purpose, I prefer to use Color Wire Hends 0,14 mm in light pink color (same as the tungsten bead). It is possible to create ribbing with the wire itself, but I twist 2 strands of wire into one, which creates a more interesting look after ribbing the fly - of course I can not fully prove the attractiveness of the fly for fish, but I like the fly this way and I think the wire effect is - thanks to the creation of smaller shiny surfaces on the twisted wick - then higher than with ordinary ribbing with a simple wire, which is often cut into dubbing and then serves only as a fixation of the body. Anyway, I caught fish on identical flies not ribbed or flies ribbed only with a reinforcing line, so I would stay with the fact that it is certainly not an essential and decisive element...
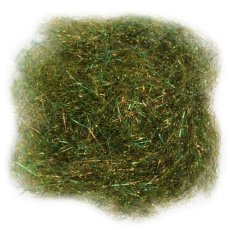
STEP 3: From the Spectra Dubbing Hends, we create a thin, attractive body in the color of a dark green peacock. As an alternative, dubbing can also be used Peacock Dubbing Hends, which is directly intended for a better imitation of the true peacock ray. The range of colors and reflections is really large, so it is possible to tie this fly in more color modifications. In terms of traditional materials, true peacock quills can be used, such as Peacock Veniard Herl. Personally, however, I also care about the lifespan of my flies, so for this reason I prefer the above-mentioned dubbings, because they are much more durable than real peacock quills, which tear over time and the fly gradually disintegrates - but of course we all know that at such a moment then the fly for fish is the most "edible"! ;-) We wrap the wound body in the opposite direction with a twisted ribbing wire, which we fix with a tying thread in the area of the thorax and cut off the rest.
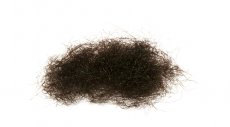
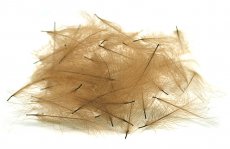
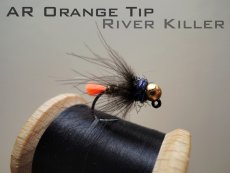
STEP 4: At this point, we have a choice of how we will create delicate hackles. Here I chose a simpler technique. That's why we fix one medium-sized CDC feather of natural gray color in the chest area. I like to use CDC feathers CDC Feathers Veniard Super Select, where you will find selected and very high quality feathers of various sizes and colors. The resulting legs are then much more sober and look very natural in the water. Another possible variant of how to create thicker hacklels is to add the CDC into a loop, which is a bit more complicated and probably a bit unnecessary for this type of fly. This technique of creating a thicker wreath of delicate hackles and partly also a thorax is described in more detail in my previous gallery At The Vice - AR Orange Tip River Killer in STEP 7 and 8.
STEP 5: We hold the CDC feather in a hackle plier and wrap it several times in the place of the fly's thorax, thus creating very decent and irregularly long hackles. Fix the rest of the feather firmly with a tying thread so that it does not come loose and cut off the end. If the hackles are too long, we can check or trim them - CDC do not have as significant grip as other feathers, so CDC cutting is feasible without any problems. If you want to have a really durable fly, you can always pre-paint the individual steps with varnish. In addition, it is very useful at this stage.
STEP 6: In the last tying step, we tie a stronger thorax of the the fly from the same material from which we created the body - for example, Peacock synthetic dubbing Peacock Dubbing Hends, or we can create it from a darker dubbing and make a two-colored fly. In aquatic and terrestrial insects, the thorax is usually always darker in color than the body itself. Personally, I like flies that are simple and color-matched into a clear and well-remembered concept and appearance - this pattern is a clear example of that, and that's why I tie the body and thorax in the same shade!
STEP 7: In the final step, we finish the fly with several lost knots between the thorax and the tungsten bead head, cut the tying thread and fix the knot with a drop of varnish! Nowadays, it is possible to use UV resins for this operation and varnishing of heads, which are already done even in very thin viscosities, such as UV Clear Fly Finish Loon Outdoors Flow. The advantage is that we do not have to wait for the varnish to harden, which gradually soaks into the thread and it is necessary to make several layers (perfect glossy heads), but as soon as we apply UV fly finish, we can immediately cure it with a quality UV light with high radiation intensity. The most important final step is a reasonable combing of the whole fly into a natural and "living" form, which is much more welcome by fish than a perfect "catalog" patterns. Now the fly is ready for immediate action in slow river currents and mysterious deep pools!
CONCLUSION: I will be very happy if you try to tie my next successful pattern with the help of this article and try it at the next possible and relevant occasion on your favorite river or stream. For me is this concept of simple and undersized flies more and more popular, and that is why such patterns i also tied in other color combinations. My next favorite, with which I often tie on my leader with today's pattern, has, for example, a light orange tip from Angel Hair, a body and chest from dark brown Spectra Dubbing with a bronze reflection, hackles from a dark CDC and a bronze tungsten bead head. This is a combination that I really believe in when fishing for large chub and its success is undeniable. I really like to catch with flies, which are so-called "complemented" on the leader and work and look great and tasty together - thanks to that I trust them even more and the subsequent success in catches only confirms my confidence in the combination of selected patterns. Well, since surprisingly none of my TOP dry flies have appeared in my fly tying series yet, I will have to fix it in the next episode! ;-)
I wish all enthusiastic fly tiers a relaxing moment At The Vice and in the fishing season 2021 Tight Lines! Aleš


